

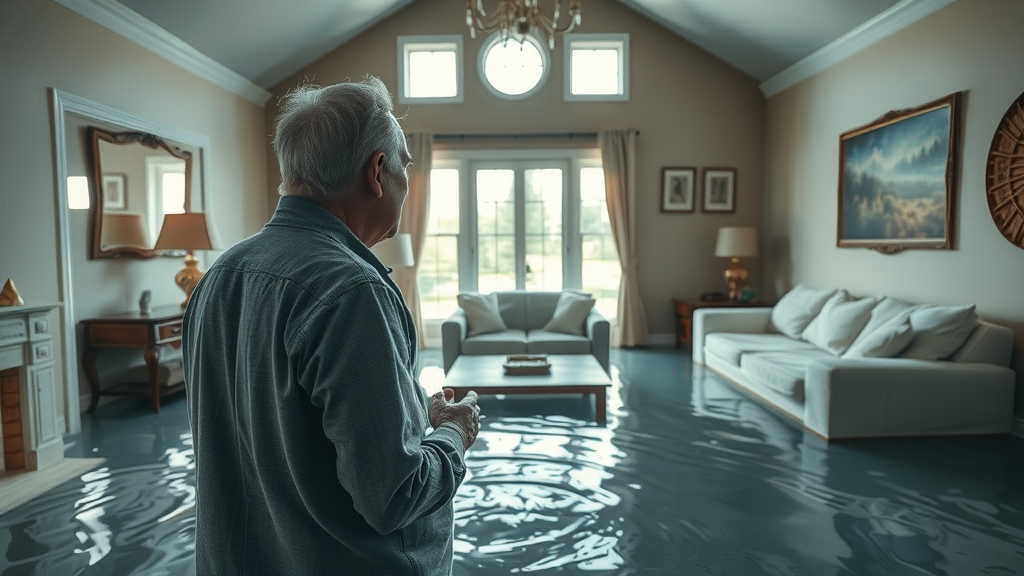
Did you know that over 14,000 people in the US face a water damage emergency at home or work each day? If you’re struggling with post water damager estoration, you’re not alone—and you’re in the right place. This detailed guide offers step-by-step advice, insider tips from restoration pros, and everything you need to know to repair, restore, and protect your property after water damage.
"Did you know that over 14,000 people in the US face a water damage emergency at home or work each day? Proper post water damager estoration is not just about recovery—it’s about preventing future catastrophe."
Startling Facts About Post Water Damager Estoration
Water damage can strike anyone, anytime—often unexpectedly. Besides the visible mess, the aftermath of flood water or a burst pipe often brings hidden dangers like mold grow and structural damage. Failing to tackle post water damager estoration right away can quickly escalate repair costs and health risks.
Studies show that over 98% of basements will experience water damage in their lifetime. Whether caused by standing water from flooding, a pipe leak, or a sewage backup, restoring your property is more than just drying floors. It involves a specialized restoration process to ensure your home or business is safe, healthy, and structurally sound.
The True Impact of Water Damage on Homes and Businesses
When water invades your living or work space, it’s not just your floors at risk. Walls, electrical wiring, insulation, and even the foundation can become compromised. Beyond the physical property damage, affected areas are prone to mold and mildew, which can aggravate respiratory problems and allergies. Rapid response and targeted damage repair protect you from long-term headaches and skyrocketing costs.
Businesses face even greater stakes. Downtime from a water event can halt operations, resulting in lost revenue and customer trust. Handled poorly, post water damager estoration can mean costly renovations and regulatory violations due to hidden moisture and mold growth. Understanding proper restoration services and taking swift action is critical for any property owner.
Understanding the Urgency of Damage Restoration
Acting quickly in the aftermath of water damage is crucial. Water works fast, soaking deeper into building materials and spreading to unaffected areas if left unchecked. The longer standing water or excess moisture remains, the higher the risk of severe property damage and mold grow. Industry experts agree: the first 24-48 hours are critical.
Damage restoration isn’t solely about making things look better—it’s about protecting your health and your property’s value. Delaying the damage restoration process allows bacteria, mold and mildew to flourish, adding to your headaches, health issues, and costs. That’s why smart property owners call a restoration pro or restoration company at the first sign of a water damage situation.
What You'll Learn in This Post Water Damager Estoration Guide
- The complete water damage restoration process from inspection to final repairs
- Critical steps for DIY post water damager estoration
- How professionals tackle damage restoration and what makes 'restoration pro' teams effective
- When to call a restoration service or restoration company
- Cost considerations and insurance factors for post water damager estoration
Defining Post Water Damager Estoration and the Water Damage Restoration Process
Post water damager estoration describes the organized set of actions taken to remove water, repair damage, and restore property after a water intrusion event. From identifying the affected area to the final touches of reconstruction, the water damage restoration process is designed to return your space to a healthy, livable condition. Understanding each step can mean the difference between a quick recovery and months of expensive repairs.
Professional restoration companies follow strict protocols to evaluate water-damaged properties, deploy advanced drying equipment, and conduct thorough cleaning and repairs. Whether the water event is from a burst pipe, flood water, or sewage backup, knowing what to expect will empower you to make informed decisions and avoid common pitfalls.

What is Post Water Damager Estoration?
Simply put, post water damager estoration encompasses all activities related to cleaning, repairing, and restoring a property after it sustains water damage. This typically involves initial damage inspection, water removal, drying, cleaning, damage repair, and sometimes reconstruction. Whether performed by a DIY-savvy property owner or a professional restoration service, the goal is always the same: eliminate water intrusion effects and restore safety and comfort.
A detailed water damage restoration process also includes addressing secondary issues, such as mold grow and hidden structural damage. Restoration pros use moisture detection tools, industrial fans, and sanitizing treatments to ensure every trace of water and contamination is eliminated.
Flood Water, Standing Water, and the Damage Restoration Process
After a water event, flood water and standing water pose immediate threats—not just to a building’s structure, but to its electrical systems and indoor air quality. Proper water removal is essential, and timing is everything. DIY attempts are usually only advised for minor situations; professional restoration services bring commercial-grade air movers, dehumidifiers, and sanitizing agents to get the job done right.
The damage restoration process varies based on the source of water (clean, gray, or black). Flood water or sewage backup requires more extensive disinfection. Professional teams begin with a thorough damage inspection, systematically remove water, and use specialized equipment to dry affected areas and prevent mold grow. Insurance companies often require detailed documentation, making a structured approach even more important.
| Criteria | DIY Restoration | Professional Restoration Service |
|---|---|---|
| Water Removal Capability | Limited to wet-vacs, towels, mops | Industrial pumps, air movers, advanced dryers |
| Mold Prevention | Basic chemicals, limited effectiveness | Specialty treatments, moisture meters, thorough drying |
| Hidden Damage Detection | Often missed, no pro tools | Infrared cameras, comprehensive inspections |
| Insurance Documentation | DIY photos, less credibility | Professional reports, claim support |
| Speed & Effectiveness | Slower, incomplete drying possible | Rapid, systematic, risk-reducing process |
| Cost Over Time | May increase if issues go undetected | Upfront cost, lower risk of recurring problems |
The Step-by-Step Post Water Damager Estoration Process
Knowing each stage of the water damage restoration process can help you plan, act decisively, and prevent future issues. The steps outlined here follow best practices used by restoration pro teams and leading restoration companies across the industry.
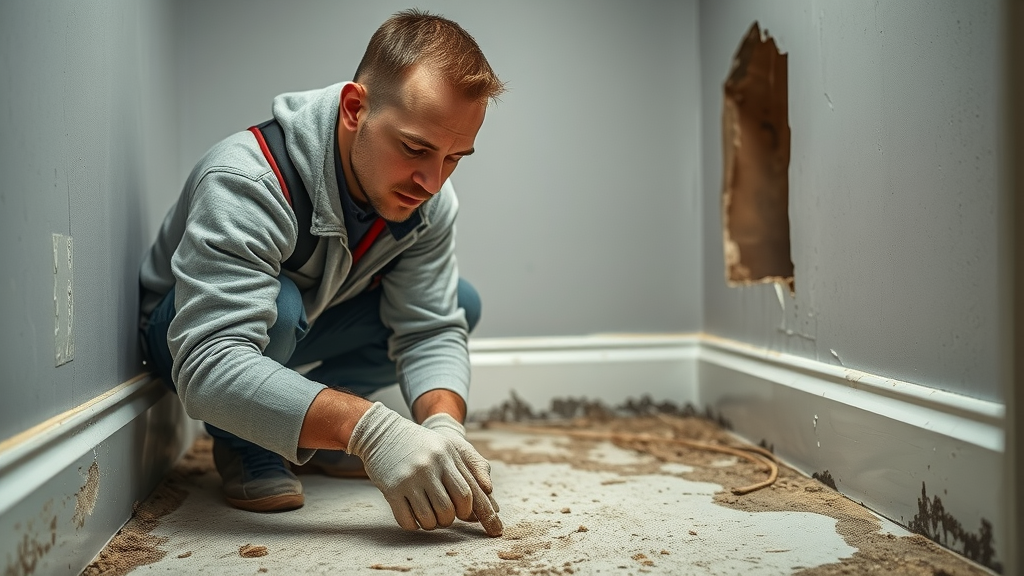
Damage Inspection: Identifying the Affected Area
The restoration process always starts with a detailed damage inspection. Using moisture meters, infrared cameras, and visual checks, professionals assess every affected area—looking for obvious water stains as well as hidden pockets of moisture behind walls, under floors, and in insulation. Quick identification is crucial since even a small, overlooked wet spot can fuel mold grow and require further damage repair down the line.
For the property owner, documentation is king. Take detailed notes, photos, and video of all property damage as soon as possible. Insurance companies need a clear record of the affected areas to process claims efficiently. If you’re considering DIY, invest time in a careful examination (never skip checking crawl spaces and basements).
Water Removal and Handling Standing Water
After inspection, the top priority is removing standing water. The longer water sits, the more it seeps into flooring, drywall, and even a home’s foundation, compounding the damage situation. Restoration pros use pumps, wet-dry vacuums, and commercial air movers for rapid, large-scale water removal. In smaller, accessible cases, property owners can use wet-vacs and towels, but must beware of electrical hazards.
Expect to move quickly to halt further property damage. Always turn off the power and water source in affected areas to minimize risk. Don’t attempt to use regular household vacuums—this is a common mistake! Professional restoration services assess water quality (clean, gray, or black water) and tailor their water removal tactics for proper safety and effectiveness.
- Turn off power and water supply to prevent hazards
- Document all damage for insurance purposes
- Remove small valuables and furnishings from affected areas
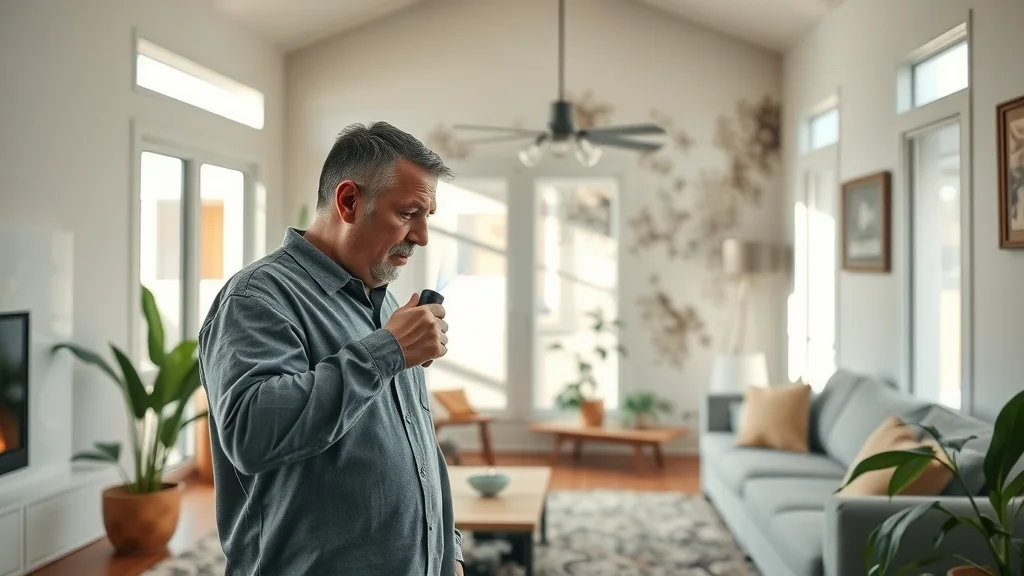
Drying and Dehumidification to Prevent Mold Grow
Once standing water is removed, the race is on to achieve complete drying and dehumidification. Professional restoration teams deploy high-powered air movers, dehumidifiers, and moisture sensors to accelerate the drying process. These tools are essential to prevent mold grow, which can begin in as little as 24-48 hours after a water event.
DIY drying may seem straightforward, but home fans and open windows aren’t always enough to dry deeper building materials. Structural damage and continued mold growth remain risks if any dampness lingers. Restoration services monitor progress, track humidity, and test surfaces to ensure a safe result—protecting against long-term issues that could go undetected.

Cleaning, Sanitizing, and Damage Repair
After removing water and drying the affected areas, cleaning and sanitizing come next. Mold and mildew spores, bacteria, and chemicals from flood water or sewage backup often contaminate surfaces. Restoration pros use EPA-approved cleaning agents and advanced techniques to ensure spaces are truly safe.
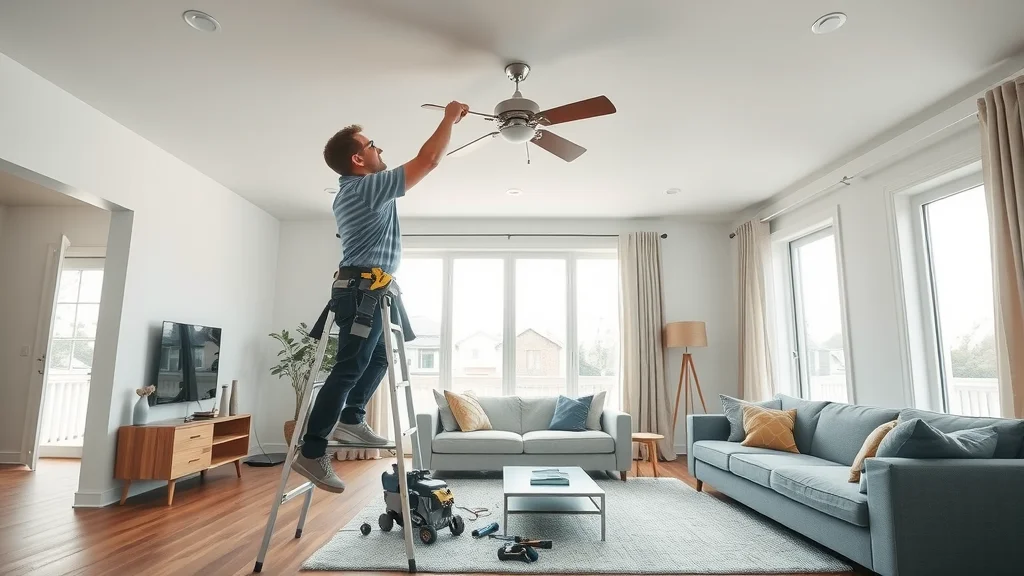
Once cleaned, damage repair begins—replacing drywall, painting walls, and repairing woodwork or flooring as needed. This stage in the restoration process addresses not just appearance, but the underlying structure and safety of your property.

Restoration and Reconstruction: Finalizing the Restoration Process
The final step may include rebuilding entire rooms, repainting, or replacing fixtures and carpentry. Restoration pros focus on restoring your property to its pre-loss condition, sometimes enhancing it to guard against future water intrusion. Quality restoration services provide a seamless transition from crisis to comfort, giving you peace of mind.
Good restoration companies walk you through the final inspection, hand over documentation for your insurance company, and share maintenance tips to help you prevent future damage. Professional restoration ensures every detail is handled, leaving no trace of the original water event.
Watch: Video walkthrough—How a restoration pro handles water damage restoration
Professional vs. DIY Post Water Damager Estoration
Choosing between DIY and professional restoration services hinges on the scale and nature of your water damage situation. While minor spills can occasionally be managed by a handy property owner, most significant events demand a restoration pro. The right restoration company offers peace of mind, better results, and streamlined insurance claims.
Understanding both the possibilities—and the pitfalls—of each approach can help you make a smart, cost-effective decision.
When Should You Call a Restoration Company?
Call a restoration company immediately if you notice: large volumes of standing water, flood water from storms or sewage backups, water-damaged walls or ceilings, electrical hazards, or signs of mold grow. If you’re overwhelmed or if insurance documentation is required, bringing in a restoration service is your best choice.
Fast action by professionals reduces long-term damage repair costs and helps your insurance company process your claim efficiently. In situations where water damage threatens your property’s structural integrity or your family’s health, never hesitate to contact a restoration pro.
The Advantages of Hiring Professional Restoration Services
Professional restoration services bring more than equipment—they offer expertise. Restoration pros understand how to perform a thorough damage inspection, water removal, drying, and damage restoration process, all while ensuring your property and its occupants stay safe. They use industrial-grade tools (like high-capacity air movers and specialty dehumidifiers), specialized cleaning solutions, and proven methods to prevent mold and future property damage.
A major advantage is documentation. Restoration companies help property owners meet all insurance company requirements, offering detailed reports and photos to support claims. Their experience translates to quicker, more reliable repairs and reduces the chances of lingering issues or recurring water damage.

Restoration Pro Tips: Essential Tools & Safety Practices
Proper post water damager estoration starts with safety first. Use rubber gloves, boots, and masks when entering water-damaged spaces. Always turn off the electricity before inspecting any affected area. Restoration pros rely on equipment like wet/dry vacs, infrared thermometers, moisture meters, and heavy-duty air movers to speed up the restoration process and improve results.
Keep a kit of essentials: disposable towels, disinfectant, a camera for documentation, and plastic sheeting to protect dry areas. For minor water events, these tools can save you time and money. For complex situations, pro restoration services are your insurance against health risks and costly mistakes.
Limitations and Risks of DIY Damage Restoration
DIY damage restoration comes with significant risks. Without proper tools, you may overlook hidden water in drywall, flooring, or insulation—leading to future mold grow and structural costs. Using household fans or vacuums often fails to remove excess water effectively, and electrical dangers lurk in wet environments.
Insurance companies may reject claims if restoration steps are poorly documented or attempted without qualified help. Selecting a professional restoration service ensures compliance, faster recovery, and greater peace of mind for any property owner.
Cost Considerations in Post Water Damager Estoration
A common concern after any damage situation is, “What will this cost me?” The answer depends on the extent of property damage, water source, and speed of response. Insurance coverage, location, and the levels of restoration required all affect final costs. Planning ahead and opting for certified restoration services can make a significant difference to your out-of-pocket expenses.
What is the Typical Cost for Water Damage Restoration?
Water damage restoration costs typically range from $1,200 to $5,000 for most homes, but severe flood water scenarios or structural restoration can run much higher. Costs are driven by the extent of affected areas, the necessity of mold treatment, and the complexity of the restoration process. Minor damage repair after clean water leaks may be less expensive, while contaminated water or delayed response can quickly increase expenses.
Professional restoration services often include cleaning, sanitizing, repairs, and necessary reconstruction, giving you full transparency before work begins. Always seek a written estimate and check if your insurance company will cover the loss.

Working with Your Insurance Company on Damage Restoration
Cooperation with your insurance company is key to a stress-free restoration process. Begin by reporting your water damage situation promptly and supply all requested documentation. Take photos, keep damaged items, and save receipts for any materials or services. Restoration pro teams often support claims by supplying comprehensive inspection reports and step-by-step documentation.
Stay in contact with your claims adjuster, ask about covered restoration services, and verify whether mold grow and damage repair are included. A clear paper trail ensures the best chance of recouping your costs and minimizes disputes with your insurer.
"Prompt action and thorough documentation can be the difference between an easy claim process and thousands out of your own pocket." – Restoration Pro
Common Challenges in Post Water Damager Estoration
Despite best efforts, water damage restoration can be tricky. Hidden moisture, fast-growing mold, and incomplete drying challenge even skilled property owners. Relying on restoration pro teams helps address these hurdles and safeguards your property’s long-term value.
How to Repair After Water Damage: Practical Steps
To repair after water damage, begin with a complete damage inspection. Remove all standing water and start the drying process using fans or air movers. Follow by thorough cleaning and disinfection to counteract mold and bacteria. Repair or replace damaged materials like drywall, insulation, or flooring. In severe cases, bring in a restoration company to ensure hidden moisture is addressed and all health risks are removed.
Focus especially on baseboards, wall cavities, and crawl spaces—these locations often harbor trapped moisture that fuels mold growth and ongoing property damage. Proper repairs, using restoration pro methods, deliver safer results and limit your risk of recurring water issues.
Mold Grow: The Silent Threat After Water Damage
After water damage, mold grow can start within 24 hours if affected areas are not thoroughly dried. Mold and mildew produce odors, damage surfaces, and can harm your health—especially for children, seniors, or those with allergies. Cleaning and disinfecting alone may not be enough; use moisture sensors and pro-grade dehumidifiers to make sure all hidden areas are dry and safe.
Restoration pros typically follow up after repairs to check for new or lingering mold issues, providing peace of mind that your home or business won’t face further property damage surprise attacks.
What Not to Do After Water Damage
Avoid these common mistakes after a water event:
- Don’t use regular household vacuums for water removal
- Don’t ignore hidden moisture behind walls and floors
- Don’t delay damage inspection by restoration services
Each of these missteps can make your restoration process longer, more expensive, and more stressful. Quick, professional attention is always worth it.
Case Study: Successful Post Water Damager Estoration
To better illustrate the impact of professional restoration services, let’s explore a real-life case.
Restoration Process of a Flooded Home
When a family home was overrun by flood water, restoration pros acted quickly. Damage inspection identified hidden water behind walls and beneath floors. High-capacity air movers and dehumidifiers rapidly dried affected areas, while certified technicians performed cleaning, sanitizing, and repairs. Mold growth was managed, and the family returned home in just eight days—far faster than average DIY outcomes.
Insurance claims were approved on first submission, thanks to the restoration company’s detailed documentation and expertise.
Before and After: Visual Results of Water Damage Restoration
The transformation from disaster to a clean, safe home was dramatic. Where there had been standing water, damaged drywall, and ruined furnishings, the after photos showed pristine floors, fresh walls, and a sense of peace restored. This case underscores how choosing the right restoration pro can restore more than property—it brings back comfort and security.

People Also Ask: Key Questions About Post Water Damager Estoration
What is the typical cost for water damage restoration?
Answer: The usual cost for water damage restoration ranges from $1,200 to $5,000, depending on the damage severity, extent of water removal required, and cleaning/restoration services used.
How to repair after water damage?
Answer: Begin with damage inspection and water removal, then dry and dehumidify all affected areas. Clean, sanitize, and perform repairs or replacements as needed. Engage a damage restoration pro for extensive restoration needs.
Is water damage restoration worth it?
Answer: Timely water damage restoration prevents mold, structural damage, and high-cost repairs—making it a crucial investment in your property’s longevity.
What not to do after water damage?
Answer: Never touch electrical outlets or devices in water, avoid DIY water removal in hazardous conditions, and don’t wait to contact restoration professionals.
Frequently Asked Questions About Post Water Damager Estoration
- How long does post water damager estoration take?
- What should I look for in a restoration company?
- Does my homeowner’s insurance cover all restoration services?
- What are the signs of hidden damage after standing water?
Key Takeaways for Post Water Damager Estoration
- Immediate response to water damage is crucial
- Professional restoration services ensure comprehensive recovery
- Proper documentation can streamline insurance claims
- Neglecting mold grow and hidden moisture can cause long-term damage
Conclusion: Act Fast for Effective Post Water Damager Estoration
Don’t Delay—Restore, Repair, and Protect Your Property Now
"Water can destroy in seconds—restoration pro teams save in hours."
Call to Action: Call Gold Coast Flood Restorations at (619) 449-9611
Sources
When dealing with water damage restoration, it’s crucial to act promptly and follow expert guidance to mitigate further damage and health risks. The U.S. Environmental Protection Agency’s resource on mold provides comprehensive information on mold prevention and remediation, emphasizing the importance of moisture control in preventing mold growth. Additionally, the American Red Cross offers a detailed guide on water damage restoration, outlining essential steps to take immediately after water damage occurs, including safety measures, water removal, and drying techniques. These resources offer valuable insights and practical steps to effectively restore your property and safeguard your health.

Write A Comment