Add Row
Add Element
UPDATE
Add Element
  • Home
  • Categories
    • Business and Economy
    • Community
    • Small Biz
    • Policy and Law
    • Real Estate
    • Modern Life
    • Explore the U.S
September 16.2025
1 Minute Read

Thinking of Adding on a Screened-In Porch? Avoid These Mistakes

Did you know that more than 30% of homeowners regret at least one major choice when adding on a screened-in porch to their home? From blown budgets to porches that don’t suit the outdoors or dining needs, pitfalls abound—but they’re avoidable. This guide unpacks the mistakes most homeowners make when adding on a screened-in porch and delivers step-by-step advice in the friendly and practical style of Bob Vila. If you’re dreaming of creating the perfect outdoor living space that brings fresh air and comfort to your family year-round, read on before you build!

Startling Facts About Adding on a Screened-In Porch

Adding on a screened-in porch transforms your home’s value and daily living—yet nearly one in three projects goes over budget or ends up requiring major fixes later. According to the National Association of Home Builders, porch additions remain one of the most requested upgrades in American suburbs, and a screened porch is especially popular for enjoying meals, relaxing, and bridging the gap between indoors and outdoors. But with prices varying by location, material, and design, it’s critical to know what you’re getting into. Before you pick out your dining set or string lights, be sure you plan right to avoid these all-too-common and costly mistakes.

inviting suburban home exterior with a stylish screened-in porch, cheerful ambiance, family enjoying evening conversation, lush green backyard, blooming flowers, highly detailed, warm natural daylight, realistic color palette - adding on a screened-in porch

What You’ll Learn When Adding on a Screened-In Porch

  • Key planning considerations before adding on a screened-in porch
  • Common construction and design mistakes to avoid
  • Insider tips for choosing materials like composite decking
  • Cost factors by square foot and budgeting advice
  • Regulatory and permit requirements
  • How adding on a screened-in porch can enhance outdoor dining experiences

Understanding the Basics: Adding on a Screened-In Porch

What is Involved in Adding on a Screened-In Porch?

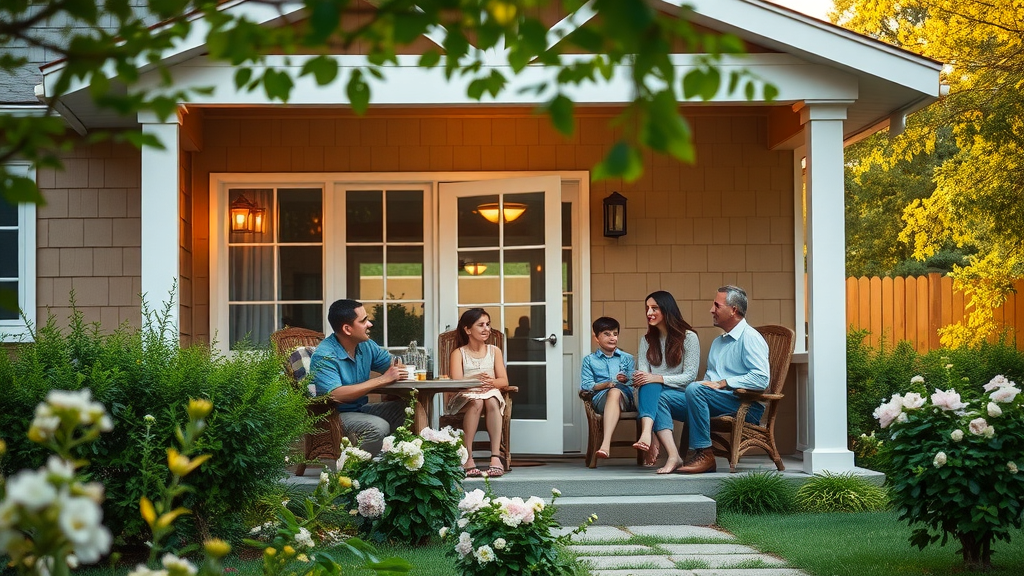
Adding on a screened-in porch involves much more than enclosing a deck with mesh. It starts with solid planning—defining the purpose of the space, such as expanding your outdoor living area, creating a fresh air retreat, or crafting the ideal dining space for al fresco meals. From day one, think carefully about layout, traffic flow, and how you’ll transform your screened living space to suit seasonal needs. Whether you use a composite deck or rustic wood, your selection impacts durability, appearance, and maintenance.

Most screened porch additions require structural elements like foundations, framing, roofing, screen material, and often, upgrades to comply with code (especially for ceiling fans and air circulation). It's common to want to enjoy meals outside, so focusing on outdoor dining features and comfort—like overhead lighting, screens that keep insects and weather at bay, and practical touches such as a screen door—makes all the difference. With thoughtful planning and the right contractor or professional installation, you can ensure your screened porch stands the test of time and boosts your home improvement value.

modern architectural drawing of a screened-in porch addition, hands working on blueprints, design process, drafting table, adding on a screened-in porch

Pre-Planning Mistakes When Adding on a Screened-In Porch

Neglecting Permit and Zoning Requirements

One of the biggest mistakes you can make when adding on a screened-in porch is failing to check local permit, zoning, and HOA regulations. Many municipalities require a building permit—even for remodeling an existing porch—to ensure safety and proper setbacks. Ignoring these rules can result in fines, project delays, or, worst case, having to tear down your brand new addition. Always start with a call to your city or county’s planning office—have your blueprints and plat map handy. Confirm setback requirements, maximum allowable porch sizes, and if you need architectural plans stamped by an engineer. This front-end research not only saves you headaches, but it also streamlines the inspection and approval process.

Misjudging Budget by Square Foot

Failing to estimate costs accurately per square foot is another pitfall. While you may expect to pay $30-$120/square foot, the range can vary dramatically based on your choice of composite deck, screen material, custom windows, and even foundation type. Many homeowners forget to budget for extra features—like ceiling fans, upgraded lighting, or extra potted plants—which can quickly balloon the project’s cost. Get multiple estimates, factor in contingencies, and always review material and labor quotes line-by-line to avoid financial surprises mid-construction.

Average Cost per Square Foot for Adding on a Screened-In Porch
Material Type Low-End ($/sq. ft.) Mid-Range ($/sq. ft.) High-End ($/sq. ft.)
Pressure-Treated Lumber $30 $55 $70
Composite Decking $65 $90 $120
Cedar/Redwood $50 $75 $100
Enclosure Screens & Windows $10 $20 $40+

Selecting the Right Materials for Your Screened-In Porch Addition

Composite Deck vs. Traditional Materials

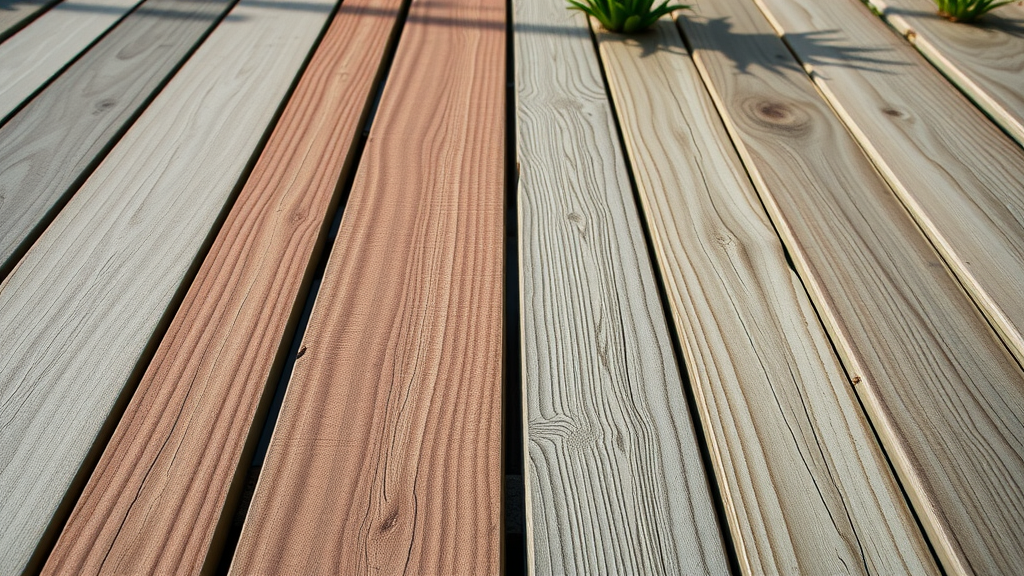
When adding on a screened-in porch, selecting the right flooring and enclosure material is critical for comfort, maintenance, and longevity. Composite deck boards are a top modern choice, boasting resistance to rot, insects, and harsh weather, plus a variety of color palette options. Compared to rustic wood, composite decking requires far less maintenance—no need for staining or sealing each year—and typically comes with a 25-year warranty. Still, traditionalists may prefer the warmth and character of pressure-treated wood or cedar, especially in regions where those materials complement existing home design. Your decision will significantly affect not just the upfront cost per square foot, but also the long-term durability and return on investment.

"Composite decking can last twice as long as pressure-treated lumber, making it a wise investment for any screened-in porch," – Local porch builder.

Mistakes to Avoid When Choosing Materials

Homeowners too often underestimate the impact of surface materials on both budget and experience. For instance, choosing the wrong type of screen material can lead to tears or sagging from winter weather, while neglecting climate-specific issues (like humidity or frost) can shorten the lifespan of even high-end decking. Always balance up-front savings with future maintenance requirements—pressure-treated lumber may cost less initially, but composite decking offers lower long-term upkeep. Don’t ignore manufacturer recommendations for fasteners or finishes; skipping these can void warranties or cause early repairs.

  • Overlooking climate-specific issues
  • Ignoring maintenance requirements
  • Underestimating long-term costs

contrasted close-up of composite decking and aged wooden planks, outdoor deck environment, natural textures, composite deck materials, adding on a screened-in porch

Design and Layout Pitfalls in Adding on a Screened-In Porch

Failing to Plan for Outdoor Dining

A screened porch should feel like an extension of your home, especially when it comes to outdoor dining. One of the most common mistakes is failing to allocate enough dining space for a proper dining table and comfortable chairs. Consider how you’ll use the area: Is it just for casual seating, or do you envision big family gatherings with a full dining set and space to move around? Think about features that add soft ambiance—string lights, potted plants, and a ceiling fan can create a fresh air, welcoming space. Also, be sure to plan for electrical outlets and low-voltage lighting if you want to enjoy meals outdoors well into the evening.

Don’t overlook sight lines to the backyard, access to the kitchen, and paths for serving food. A well-designed porch makes indoor-outdoor dining seamless, so you’ll actually use it often. This attention to layout transforms your screened porch into your favorite place for enjoying nature, entertaining friends, and savoring a breezy meal.

cheerful family enjoying an outdoor meal on a spacious screened-in porch, ample dining area, adding on a screened-in porch, outdoor dining setting

Poor Traffic Flow and Connectivity

Another layout blunder when adding on a screened-in porch is poor attention to traffic flow. The porch should connect smoothly with major rooms, especially your kitchen or main living area, and be easy to access with a screen door that swings out of high-traffic paths. Avoid blocking outdoor living space with oversized furniture or awkward entry points. Keep walkways clear, and allow enough space for guests to move around the dining table without bumping into railings or each other.

Consider how indoors and outdoors merge in the design—good connectivity will boost your enjoyment, giving your family a space to gather, relax, and celebrate, rain or shine.

Construction and Installation Errors With Adding on a Screened-In Porch

Improper Foundation or Framing

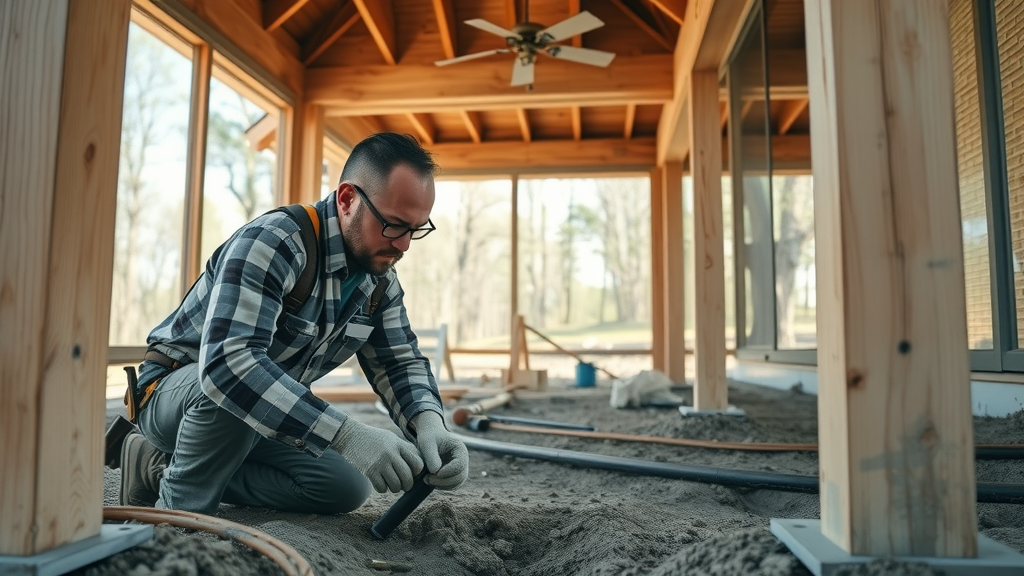
Skimping on your screened-in porch’s foundation or framing can quickly turn your project into a home improvement headache. Proper support is crucial for safety and longevity—don’t let anyone convince you to “just build over the existing porch” without verifying its integrity. Your foundation should be level, stable, and rated for your porch’s size and load, especially if using heavier features like a composite deck or stone steps. Experienced contractors will check for existing rot, termites, and water damage, then install the right footings and beams. This attention to detail ensures your porch outlasts the seasons without sagging, warping, or shifting.

Overlooking Ventilation and Drainage

Overlooking ventilation and drainage is a common error that can ruin even the most attractive screened porch. Without proper air circulation and water management, you may face mold, mildew, or wood rot—even on a composite deck, which resists some, but not all, moisture-related issues. Be sure your porch design includes enough screened openings for fresh air, and that the flooring and foundation are sloped away from your home to channel rainwater. Gutters, flashing, and drainage piping are crucial to keep everything dry underfoot. Don’t forget to double-check requirements during the professional installation process!

construction worker inspecting screened-in porch foundation and support, drainage piping, adding on a screened-in porch

Cost Control: Budgeting for Adding on a Screened-In Porch

Hidden Costs Per Square Foot

It’s easy to get caught off guard by hidden costs when adding on a screened-in porch. In addition to the basic square foot rate for carpentry and materials, you should budget for custom upgrades like screens and windows, composite decking, and code-mandated elements such as smoke detectors or electrical outlets. Permit and inspection fees are another common expense that many homeowners forget to include—but they can add hundreds (sometimes thousands) to your bottom line.

  • Custom screens and windows
  • Upgraded composite decking
  • Permit and inspection fees

Ways to Maximize ROI When Adding on a Screened-In Porch

To get the most value from your new screened-in porch, focus on improvements with the highest impact: composite decking for long-term savings, a flexible outdoor dining layout for year-round usability, and smart features such as ceiling fans, all-weather lighting, and a sturdy screen door. High-quality construction and well-chosen materials not only lower your maintenance but also increase your home’s resale value.

peaceful sunrise view from a beautifully finished screened-in porch, homeowner enjoying coffee, appreciating investment, adding on a screened-in porch

People Also Ask: Adding on a Screened-In Porch

How much does it cost to add on a screened-in porch?

The cost for adding on a screened-in porch varies widely. On average, you can expect to pay between $30 to $120 per square foot, depending on materials, design complexity, regional labor rates, and options like composite decking, custom screens, and windows. For a modest 200-square-foot porch, project costs typically run from $7,000 on the low end to $24,000+ for a fully featured space with composite decking and custom enclosures. Always collect multiple bids and leave room in your budget for permit or unexpected costs.

Do I need a permit to screen in an existing porch?

In most areas, yes—a permit is usually required to add on a screened-in porch or convert an existing porch into a functioning screened space. Even a simple “screen-in” project can affect local codes for egress, structural safety, and weather resistance. Always check with your local building or planning department before starting your project to avoid fines and project delays.

Can you turn a screened-in porch into an addition?

Yes, with the right structural and design modifications, you can convert a screened-in porch into a true addition, like a sunroom or all-season room. This typically involves upgrading the foundation, adding insulation, installing walls and windows, and connecting electrical or HVAC. Keep in mind, turning a porch into an addition may require even stricter code compliance and higher costs compared to a simple enclosed porch.

How do I add on a screened porch?

To add on a screened porch, start by planning your design and layout, then confirm permit and zoning requirements. Choose materials—composite decking is popular for durability—and set your budget per square foot. Hire a qualified contractor or architect, then complete site preparation, foundation installation, framing, screen installation, and finishing touches like lighting or ceiling fans. Be sure to inspect for drainage and ventilation issues at every step. Call us at 479-903-1630 for expert help with your project.

Key Takeaways: Smart Steps for Adding on a Screened-In Porch

  • Plan for permits and zoning before starting
  • Account for all square foot costs—including materials like composite decking
  • Prioritize outdoor dining and traffic flow in your design
  • Avoid cheap shortcuts that can lead to costly repairs

FAQs: Adding on a Screened-In Porch

  • How much maintenance does composite decking require for a screened-in porch?
    Composite decking is low maintenance. Regular sweeping and occasional washing with mild soap and water are usually enough to keep it looking its best. Unlike wood, it doesn’t splinter, warp, or need yearly staining—making it a smart choice for busy homeowners.
  • What design tips work best for outdoor dining in a screened-in porch?
    To create a comfortable dining area, choose a table that fits your space and leaves room to walk around. Add soft lighting (like string lights or a ceiling fan with integrated light), potted plants for ambiance, and consider weather-resistant furniture cushions. Plan the porch near the kitchen for easy meal service.
  • Can I install a screened-in porch on an existing composite deck?
    Yes, provided the existing deck is structurally sound and properly supported for the extra weight of walls and a roof. Have a professional check the foundations, footings, and framing before you begin, and reinforce as needed to ensure safe, long-lasting results.

Conclusion: Avoid Stress with Your Screened-In Porch Addition

"A screened-in porch quickly becomes the heart of any home. Build it right the first time, and it will serve your family for years to come."

Ready to Get Started Adding on a Screened-In Porch?

Don’t let common mistakes delay your dream of outdoor living—call us at 479-903-1630 and get expert help turning your screened-in porch vision into a stunning, lasting addition for your home.

How to plan, design, and successfully build a screened-in porch addition: expert tips, common pitfalls, and material selection (with focus on composite decking).

Learn what not to do when planning and building your new screened-in porch, and see pro solutions to the most frequent design and construction errors.

Sources

  • Example Site
  • National Association of Home Builders
  • BobVila.com - Screened-In Porch Cost
  • Houzz - How to Add a Porch

When planning to add a screened-in porch, it’s essential to be aware of common pitfalls to ensure a successful project. For instance, failing to check local permit and zoning requirements can lead to fines or project delays. Additionally, underestimating costs per square foot may result in budget overruns. To gain a comprehensive understanding of these challenges and how to avoid them, consider reading “4 Ways to Save When Adding on a Screened-In Porch.” This resource offers practical advice on budgeting, material selection, and design considerations to help you make informed decisions. If you’re serious about creating the perfect outdoor living space, this guide will provide valuable insights to streamline your project.

Modern Life

0 Comments

Write A Comment

*
*
Please complete the captcha to submit your comment.
Related Posts All Posts
03.30.2026

Best Mold Remediation Services in San Diego CA

Did you know that over 60% of homes in San Diego show signs of indoor mold growth at some point? That’s a staggering statistic for such a sunny city, and it means hundreds of families and businesses face serious risks every year. Mold isn't just unsightly—it can cause persistent health problems, costly property damage, and even devalue your biggest investment. If you want solutions and peace of mind, read on for your comprehensive guide to the best mold remediation services San Diego offers. Why Mold Remediation Services in San Diego Are Essential In San Diego, mild winters and moist ocean breezes make mold growth a year-round threat. Untreated mold doesn’t just result in musty odors—it can lead to respiratory illnesses, aggravate allergies, and cause structural damage to your home or business. The main keyword: mold remediation services San Diego, is at the heart of protecting local buildings and the people inside them. In San Diego county, properties left with unchecked mold damage often see costly repairs, potential loss of property value, and significantly higher insurance premiums. Health Risks: Mold spores can trigger allergies and worsen asthma, especially in children and seniors. Property Damage: Persistent moisture and humidity in San Diego county allow mold to damage drywall, wood, and insulation, undermining a structure’s integrity. Unique Local Threats: San Diego homes often feature stucco or other breathable building materials, which can conceal mold problems until major damage is visible. “San Diego’s unique climate makes mold remediation a year-round necessity for homeowners. ” – Local Remediation Expert What You’ll Learn About Mold Remediation Services in San Diego What a professional mold remediation service includes, from inspection to removal and restoration. How to tell exceptional providers from standard mold removal companies, comparing certifications, technology, and results. Step-by-step breakdown of the removal process: what you can expect and what to look for. How to choose the best local company—understanding credentials, reviews, and insurance considerations. When to call for help and how to protect your home or business from future mold damage. Understanding the Mold Problem in San Diego County Mold problems in San Diego County are more common than most residents realize. Thanks to coastal humidity, seasonal rains, and older home construction, many properties face conditions ideal for mold growth. Common species include black mold (Stachybotrys chartarum), Aspergillus, and Penicillium, each with unique risks for both health and property value. These mold types thrive in places with moisture and poor ventilation—think bathrooms, basements, and attics. Left untreated, infestations can spread quickly behind walls or beneath flooring, making detection and early intervention essential. Professional remediation services understand these risks and use advanced equipment like air scrubbers and thermal imaging to pinpoint sources and stop the problem at its root. Mold Remediation Services San Diego: What’s Included A typical mold remediation service in San Diego covers more than just removing visible mold. The removal process usually includes several vital steps to ensure complete elimination and long-term prevention: Inspection: Identifying all affected areas with moisture meters and infrared cameras. Containment: Isolating the affected area to prevent mold spores from spreading throughout the home or business. Air Filtration: Using HEPA filters and industrial air scrubbers to capture airborne spores and purify the indoor air. Mold Removal: Removing contaminated materials and thoroughly sanitizing remaining surfaces with EPA-approved solutions. Prevention: Applying mold inhibitors and fixing sources of water damage to prevent future growth. Choosing a provider specializing in remediation service ensures your property is safer, healthier, and protected against future mold problems. Companies that offer transparent walkthroughs and free estimates typically give you better peace of mind. Since water intrusion is a leading cause of mold growth, it's wise to familiarize yourself with the early warning signs of water damage in your property. Recognizing these indicators can help you address moisture issues before they escalate into more serious mold problems. Service Level Standard Mold Remediation Premium Mold Remediation Emergency Mold Remediation Inspection & Diagnosis ✔ Basic visual & moisture testing ✔ Detailed infrared scanning & lab analysis ✔ Rapid on-site emergency inspection Containment & Air Filtration ✔ Standard plastic sheeting, portable air scrubbers ✔ Full negative air barriers, commercial HEPA filtration ✔ Immediate containment, industrial air cleaning Mold Removal ✔ Manual removal, disinfecting agents ✔ Advanced chemical, steam treatments, material replacement ✔ 24/7 rapid material removal & temporary repairs Restoration & Prevention Optional ✔ Structural repairs, warranty, and prevention plan Emergency patching, future consultation Key Features of Professional Mold Remediation Service San Diego Offers The best mold remediation services San Diego specialize in more than just mold cleanup. Top-rated companies are equipped to manage complex cases involving water damage restoration, fire damage cleanup, and even smoke damage removal. These extra capabilities matter when unforeseen disasters strike and time is critical for property safety and recovery. What separates elite providers from the rest? Look for those who use advanced equipment—like negative air machines, industrial air scrubbers, and digital moisture meters. Top companies employ certified technicians trained in both mold removal and restoration, ensuring your property is returned to a safe, pre-damage condition. A professional mold remediation service should always provide detailed assessments, transparent timelines, and robust customer support. How to Choose the Best Mold Removal and Remediation Companies Selecting the right provider for remediation service in San Diego county is critical to protecting your home or business. Not all mold removal companies are alike; the best offer third-party certifications (such as IICRC), local city or county business licenses, and full insurance that covers property and worker liability. Always look for positive online reviews and before-and-after galleries that show actual results. Verify professional credentials and state licensing. Review insurance documentation—protecting both you and the technicians is essential. Read customer reviews and ask for references from recent projects in San Diego County. Request free estimates or detailed proposals before hiring. Make sure the company offers a clear remediation plan and a post-removal guarantee. “Always confirm that your selected removal service is certified and insured for mold damage—don’t be afraid to ask for proof. ” Top 5 Mold Remediation Services San Diego CA Gold Coast Flood Restorations – Renowned for rapid response, transparent pricing, and the thoroughness of their remediation services across San Diego. Mold Safe Solutions – Noted for cutting-edge mold detection and environmentally-safe mold removal techniques. San Diego Mold Removal Pros – Highly reviewed for their comprehensive service, including water and fire damage repairs. Pacific Mold Pros – Stand out with their certified team, industry-leading guarantees, and strong focus on customer education. 911 Restoration of San Diego – Experts in large-scale emergencies, available 24/7 for critical removal service needs. Benefits of Hiring a Professional Mold Remediation Service in San Diego Choosing experienced remediation services San Diego brings peace of mind to homeowners and property managers. Not only do certified technicians follow strict protocols for health and safety, but they also save you time and trouble by addressing underlying issues such as water damage, fire damage, or even unnoticed structural repairs. Professionals use advanced equipment and EPA-approved solutions to eliminate even stubborn infestations. Health: Thorough cleanup and air purification mean reduced risk of respiratory symptoms and allergies. Efficiency: Pros complete the job quickly, minimizing disruption, and preventing recurring issues with professional-grade prevention steps. Comprehensive Service: The best companies offer all-in-one packages, handling removal and remediation for complex cases where multiple types of damage overlap. How Mold Remediation Services in San Diego Work: Step-by-Step Process Understanding the removal process employed by top remediation services helps set expectations and ensures quality results. Here’s how the best in the business protect San Diego properties: Inspection: Visual exam, moisture mapping, and air quality testing to identify all trouble spots. Containment: Isolating the affected areas with plastic barriers and sealing off HVAC vents. Air Filtration: Deploying air scrubbers to clean the indoor environment and prevent the spread of mold spores. Removal & Cleanup: Careful disposal of contaminated materials, thorough cleaning of all surfaces, and application of anti-microbial agents. Restoration: Repairs to affected areas, repainting, and providing recommendations to prevent mold from returning. Final Inspection: Ensuring all mold is gone, no odors remain, and humidity/moisture levels are within safe ranges. Comparing Mold Removal and Mold Remediation: What’s the Difference? While “mold removal” and “mold remediation” are often used interchangeably, the distinction matters. Mold removal typically refers to the physical act of stripping visible mold from surfaces. However, this alone doesn’t address the root problems, like high moisture or hidden spores. Mold remediation is a holistic process that includes removal, cleansing the air, decontamination, and addressing the underlying causes such as leaks or prior water damage. Regulatory definitions in California often require remediation to follow strict safety, air quality, and disposal protocols, which means results are verifiable and lasting. For lasting peace of mind and better property outcomes, remediation—not just removal—is the gold standard. When to Choose Mold Removal Mold Remediation Minor, surface-level mold issues ✔ Widespread infestation, recurring mold ✔ Water or fire damage concerns ✔ Property sale or insurance compliance ✔ Signs You Need Mold Remediation Services San Diego Now Visible mold stains or dark patches—especially in bathrooms, kitchens, attics, or basements. Musty odors that linger despite fresh air or cleaning. Recent water damage: leaks, flooding, or burst pipes in your home or business. Cold or allergy-like symptoms: sneezing, coughing, or skin irritation that improve outside the property. San Diego’s combination of salty air, seasonal humidity, and common building materials makes it vital to take signs of a mold problem seriously. Cost Factors for Mold Remediation in San Diego County Severity of Infestation: More extensive areas or deeper penetration will take longer and require more resources. Location: Attics and crawlspaces can be harder to reach, impacting labor costs. Square Footage: Larger homes or offices have more affected areas that must be addressed. Type of Service: Emergency or premium services may cost more but add value through faster response or advanced restoration. Additional Damage: The need for water damage, fire damage, or structural repairs can add to the price. Customer Reviews: Experiences with Mold Remediation Services in San Diego "After a pipe burst, my bathroom was a mess. The removal service responded fast, contained the area, and now it looks brand new." "I never realized how much mold damage was lurking in our attic until the inspection. Remediation services walked us through every step, and we’re breathing easier now." "Professional mold remediation saved my rental property value—happy to recommend them to anyone with a mold problem in San Diego County." People Also Ask About Mold Remediation Services San Diego How much does mold remediation cost in San Diego? The cost of mold remediation in San Diego varies depending on the extent of mold damage, the size of the affected area, and the level of service required. Generally, costs can increase for premium technology, after-hours emergencies, or simultaneous water/fire damage restoration. Most reputable companies offer free estimates so you know what to expect up front. Is there a difference between mold removal and mold remediation? Yes. Mold removal deals with getting rid of visible mold, while remediation addresses the underlying cause and ensures long-term health and safety by eliminating spores, moisture, and preventing future growth. For persistent or hidden problems, remediation is usually advised over simple removal. What is the average cost to get rid of mold? The average cost to remediate mold in San Diego ranges depending on the severity, but most jobs reflect your property’s square footage, affected surfaces, and additional services like demolition, repairs, or environmental testing. Premium or emergency services can be higher but often shorten timelines and guarantee safer outcomes. How much does it cost to get mold removed professionally? Professional pricing structures usually include inspection, containment, removal, and final clearance testing. Depending on the size and scope, you may see additional costs for water or fire damage handling, advanced air purification, and restoration of affected areas. Asking for a detailed quote or free estimate is always recommended. Frequently Asked Questions on Mold Remediation Services San Diego Does insurance cover mold remediation? Coverage varies—always check with your provider. Many policies exclude mold unless caused by a covered event like water damage. How long does the remediation process take? Most standard projects in San Diego are completed in 1–5 days, depending on severity and property size. Can services handle emergencies? Yes, reputable providers offer 24/7 emergency response and can contain issues on the same day. Are services guaranteed? The best companies stand by their work with satisfaction guarantees and post-remediation inspections or warranties. Do I have to leave my home? Not always. For limited mold problems, you can often stay during the process; larger jobs may require temporary relocation for safety. Key Takeaways for Homeowners Considering Mold Remediation Services San Diego Act fast if you notice mold—delays can worsen mold damage and increase costs. Only hire licensed, insured, and certified professionals who specialize in mold remediation services for San Diego County. Request free estimates and clear answers on methods, results, and guarantees. Keep your home or business dry, ventilated, and regularly inspected, especially after water damage or heavy rainfall. Protect your health, property value, and peace of mind with a quality removal and remediation provider. Get Help Fast: Mold Remediation Services San Diego If you suspect a mold problem or want a free professional evaluation, don’t wait. Call Gold Coast Flood Restorations at (619) 449-9611 to arrange prompt, expert remediation services in San Diego today. Take action now—your healthy home starts with the right team! Mold issues rarely occur in isolation—often, they’re the result of underlying water damage that goes unnoticed until it’s too late. If you’re committed to safeguarding your property for the long term, consider exploring the full range of water damage warning signs that every San Diego homeowner should know. By staying proactive and informed, you’ll be better equipped to prevent future mold outbreaks and protect your investment. For those seeking advanced strategies and peace of mind, understanding the early indicators of water intrusion is the next step toward a healthier, safer home environment. To further enhance your understanding of mold remediation services in San Diego, consider exploring the following resources: “Mold Remediation Services San Diego CA - Remove Black Mold | KIC Restoration” This resource provides insights into the importance of professional mold remediation and the services offered by KIC Restoration in San Diego. “Mold Remediation Services San Diego CA - Pacific Flood Restoration” This resource offers information on mold removal and remediation services provided by Pacific Flood Restoration in San Diego. If you’re serious about safeguarding your property and health from mold-related issues, these resources will provide valuable information and guidance.

03.17.2026

Ceiling Fan Installation Cost: What You Need to Know Now

Did you know that in Dallas-Fort Worth, ceiling fan installation cost can swing from as low as $110 to well over $550—sometimes just because your room has a high ceiling or there’s no existing electrical box? If you’ve ever wondered why the price of ceiling fan installation seems so unpredictable, you’re not alone. For homeowners throughout Texas and especially in older homes, things like ceiling height, the presence of existing wiring, or even the need to install a new light fixture could make your quote double almost overnight. In this comprehensive guide, we break down every factor that affects the true ceiling fan installation cost, spotlight insider pitfalls, and help you find out what a fair price looks like in DFW and beyond. What You'll Learn About Ceiling Fan Installation Cost Understand the factors influencing ceiling fan installation cost Compare costs between handyman and licensed electrician services Learn why high ceilings and lack of an existing box affect installation costs Explore DIY vs. professional ceiling fan installation common pitfalls Uncover real cost averages in the Dallas-Fort Worth area Get answers to top questions about ceiling fan installation A Surprising Truth About Ceiling Fan Installation Cost "In Dallas-Fort Worth, the average ceiling fan installation cost ranges from $110 to $550 — but unique variables can send prices much higher." Most homeowners expect a few hours of work and a standard rate for getting a ceiling fan installed. But here’s the surprise: the underlying costs depend on much more than just labor. The biggest leaps occur if your ceiling is taller than 12 feet or if you don’t have an existing wiring setup – scenarios that can immediately double your bill. In reality, labor, home age, electrical code compliance, and the type of fan installation service you choose all play a major role in your final quote. Seasoned DFW electricians report that quick install a ceiling fan jobs may run just over $100 for a straightforward replacement, but add in high ceilings or the cost to run new wiring, and the installation cost could reach $550 or more. That’s why knowing exactly what drives the bill up is critical before hiring anyone. Overview: What Drives Ceiling Fan Installation Cost? Understanding the main variables behind ceiling fan installation cost is the key to avoiding sticker shock. Whether you’re swapping out an old fan or adding a completely new fixture, certain factors have a direct and sometimes unexpected impact on your final install cost. Most installation service companies calculate charges based on time, material complexity, and any extra safety or code requirements. A quick direct swap might take a pro just an hour, while anything involving an older home, high ceilings, or a missing electrical box requires more advanced skills and time—often with a sizeable price bump. Besides basic labor fees, ceiling fan brands, mounting brackets or remotes, energy efficiency features, the type of light fixture included, or even your home’s layout (like a tricky staircase or vaulted ceiling) can factor into costs. Knowing the difference can help you anticipate, negotiate, and budget effectively for your next ceiling fan installation. Key Factors That Determine Ceiling Fan Installation Cost Ceiling height Presence of existing wiring and boxes Type and size of ceiling fan Home layout and electrical codes Labor type: handyman vs. professional electrician Ceiling height is perhaps the biggest driver, with installations over 12 feet involving not just ladders, but additional manpower or even scaffolding. Older homes or outdoor spaces may lack existing wiring or the proper mounting brackets, requiring major prep work. The size and style of your new ceiling fan, whether it’s a standard, Energy Star, or outdoor-rated model, also influence both labor intensity and the type of wiring needed. Lastly, deciding whether to book a general handyman or a licensed electrician changes the risk, the level of insurance, and compliance with Texas electrical codes—you’ll pay more for expertise but reduce your risk of code or safety issues (which can be very costly if discovered down the line). Ceiling Fans and Their Impact on Installation Costs The style and specs of your chosen ceiling fans can be a budget decider. Modern ceiling fans often come with more advanced features like remote controls, Energy Star efficiency rates, integrated light fixtures, or innovative mounting systems. While these upgrades boost comfort and savings, they can increase install complexity and, therefore, your overall ceiling fan installation cost. For example, a basic ceiling fan swap can be completed quickly if the mounting brackets and electrical wiring are in place. But when choosing an extra-large fan, a heavy decorative model, or an outdoor-rated design meant for patios or covered decks, you’ll often require special mounting brackets and possibly an upgraded circuit, both of which add fees. Always discuss your fan installation needs and selected items up front so that your installation service can quote you appropriately. Existing Wiring vs. New Wiring and the Ceiling Fan Installation Cost Existing wiring dramatically reduces ceiling fan installation cost since it streamlines the job for your installer. If your home already has a fan or a compatible light fixture, most electricians perform a direct swap with minimal labor. But in an older home, rooms without any box or wiring above, or cases where you want a new fan in a location previously used for something else, the job requires new electrical work. Installing new wiring often means getting into the attic or even cutting into drywall and ceilings, costing you extra not just in time, but also for materials and repairs. Homeowners should expect the ceiling fan installation cost to increase by $100, $200, or more if there’s no accessible power source or the box isn’t rated for fan support—especially in homes with strict code requirements or unusual layouts. Standard Labor and Ceiling Fan Installation Cost in Dallas-Fort Worth "Based on recent surveys, most homeowners in DFW pay between $120 and $200 for a direct swap, but more complicated installs can exceed $450." Regional labor rates play a big role in what homeowners pay for ceiling fan installation in Dallas-Fort Worth. Standard pricing for a direct replacement hovers in the $120–$200 range if no unique complications are present. However, if you need new wiring, your space has a high or vaulted ceiling, or the installer has to add an electrical box from scratch, the price quickly increases—sometimes by multiple hundreds of dollars. Hiring an electrician to install a fan, rather than a handyman, generally comes with additional peace of mind, code compliance, and warranty possibilities. In DFW, many professional electricians and installation services break down costs transparently (see table below) based on whether you’re simply swapping an old fan, installing in a challenging spot, or dealing with high ceilings. Always ask for itemized quotes to see exactly what you’re paying for—including materials, labor, and safety checks—so you’re not surprised on installation day. Ceiling Fan Installation Cost Breakdown by Scenario Scenario Average Cost (DFW) Notes Replace existing fan $120-$200 Wiring/box in place Install with no existing box $220-$450 May require attic work High ceiling (12ft+) $300-$550 More safety/mechanical work Comparing DIY Versus Pro Ceiling Fan Installation Cost DIY material cost Average time investment (3–5 hours) Common mistakes and risk of failure Cost to fix DIY errors vs. hiring a pro from the start Trying the DIY route for ceiling fan installation can be tempting—especially if you’re handy, and the price for a pro seems steep. DIY materials (mounting brackets, boxes, wiring connectors) generally cost $40–$100, but that doesn’t account for owning the right tools or the real value: your time. Most homeowners spend three to five hours attempting their first ceiling fan install. Unfortunately, it’s not uncommon to hit a roadblock—especially with unfamiliar ceiling wiring, high ceilings requiring safety gear, or fan installation mistakes that only show up when the blades wobble or the fan won’t turn on. The harshest reality? If you end up calling a licensed electrician after a failed DIY job—sometimes after four hours on a weekend and a hole in your ceiling—the cost to fix and finish the project typically exceeds what it would have been to hire a pro from the start. As one local DFW installer puts it: “The most expensive call I get is for a half-completed fan install with wiring issues and mounting brackets installed wrong. ” Ultimately, DIY has its place but so does professional expertise—especially when dealing with high ceilings, heavy fans, or older electrical systems. Why High Ceilings and Missing Electrical Boxes Increase Ceiling Fan Installation Cost Impact of Ceiling Height on Installation Cost Taller ceilings—especially those measuring 12 feet or higher—drive up the ceiling fan installation cost significantly. Professionals need heavy-duty ladders, scaffold setups, and additional safety equipment just to reach and handle the install safely. In some older homes with vaulted ceiling designs or unique architectural layouts, this often translates into more than double the labor time. Specific high ceiling risks, such as mounting heavy ceiling fans securely or integrating remote controls at distance, make these jobs specialized. A standard handyman may not have the proper equipment for safe installation, so hiring an insured, licensed electrician is recommended—even if the up-front labor cost to install is higher. These extra fees cover both personal safety and home insurance liability, and they’re well worth the investment if your home has unique height challenges. The Cost to Install a Ceiling Fan When No Existing Box is Present A ceiling fan install without an existing wiring box means extra labor, material, and sometimes even drywall or attic work. Installation services must first ensure there is proper ceiling support for the fan weight, typically by adding a fan-rated electrical box and secure mounting brackets. This process pushes the install cost much higher—potentially $200 or more above a standard swap. The complexity increases further if your home’s electrical circuits need updating or if code compliance demands extra steps (such as adding a wall sconce or additional light fixture for visibility). All these tasks require more specialized knowledge, raising the ceiling fan installation cost but ensuring your new ceiling fan is both safe and legal. Handyman vs. Licensed Electrician: Who Should Install Your Ceiling Fan? The choice between hiring a general handyman or a licensed electrician can mean the difference between a quick, affordable install and long-term headaches with your ceiling fan installation. In Texas, only a licensed professional can legally run new wiring or make changes to your electrical panel—handymen are permitted to perform swaps if the wiring and box are already in place, but they cannot address deeper electrical issues. Ask any trustworthy ceiling fan installation service in DFW, and they'll confirm: licensing, insurance, and adherence to electrical codes matter for safety, insurance coverage, and home resale value. If you want to upgrade to a new light fixture, special remote controls, or a wall sconce with your fan, proper permits, and documentation are crucial. Cost to Install by Handyman vs. Professional Electrician Handymen may advertise rates as low as $75–$100 for a basic install, but these are only legal and safe if your ceiling fans are being swapped onto an existing, fan-rated box and wiring without need for code upgrades or high ceiling work. When the job calls for added wiring or safety checks, expect to pay a professional electrician’s rate of $120–$200 per fan for a simple swap—and $300+ for complicated installs. While it’s tempting to save by hiring a handyman, the risk of improper installation or lack of insurance coverage in case of accidents can seriously outweigh short-term savings. Be upfront when requesting quotes about the presence of existing wiring, your ceiling height, and any new light fixtures or additional work needed. Texas Electrical Codes, Insurance, and Installation Risks Texas strictly mandates that electrical work, including most ceiling fan installation, must follow state and city codes to protect both homeowners and workers. Only licensed electricians carry the required insurance for these jobs, which may factor into the higher install price but ultimately safeguards your property and family. Unlicensed or underqualified installs bring insurance risks, potential home resale headaches (due to failed code inspections), and even safety issues. If you’re adding new wiring, updating mounting brackets, or installing a wall sconce or light fixture with your fan, insist on proof of licensure and insurance from your installer. Ceiling Fan Installation: Weighing Short-Term Savings vs. Long-Term Costs While the impulse to save a few bucks on ceiling fan installation cost is understandable, remember: the cheapest route isn’t always the safest or most cost-effective. A professional installation service, though pricier up front, means reduced risk of electrical fires, less likelihood of noise or balance problems, and—most important—compliance with local codes that impact insurance and resale. Fixing DIY mistakes or hiring an unqualified installer increases long-term costs dramatically. If your fan wobbles, your wall sconce flickers, or your light fixture blinks after install, repair bills quickly erase your short-term savings. Investing in quality work saves you time, money, and hassle over the life of your ceiling fan. Step-by-Step: How Professionals Install a Ceiling Fan — And Where Costs Add Up Evaluate existing wiring and structural support Install mounting brackets and electrical box Attach ceiling fan and connect wiring Safety and code compliance check Clean up and test Professional ceiling fan installation follows a thorough, systematic process—one that minimizes risks and exposes hidden issues before they become costly. First, the installer checks existing wiring and ensures the ceiling can safely bear the fan’s weight with the right mounting brackets. If any part isn’t up to code, the technician must upgrade it. Next comes the secure installation of the electrical box and brackets, followed by careful wiring and connection of the fan (and attachments like a light fixture, remote controls, or wall sconces, if required). The job isn’t done after mounting. True pros run through code compliance checks, balance the fan blades, test every function, and finally clean up the space. These steps ensure your new fan is not just spinning, but safe and ready for years of trouble-free use—explaining, in part, why professional installation service rates are set where they are. How Regional Pricing Affects Ceiling Fan Installation Cost Dallas-Fort Worth pricing isn’t just about labor—it’s also about local norms for home construction. Larger Texas homes, prevalence of vaulted ceiling layouts, and frequent upgrades for high-efficiency fans mean both complexity and labor time are often above national averages. In neighborhoods with older homes, absence of existing wiring, unique lighting demands, or recent code changes, rates climb further. Professional ceiling fan installation services generally provide more competitive, itemized estimates in metropolitan areas like DFW, reflecting strong competition—but these rates can rise quickly for outlying rural zones or upscale neighborhoods with stricter compliance standards. Always ask what’s included in your quote and confirm if haul-away, old fixture removal, or attic work carries extra charges. What Is a Fair Ceiling Fan Installation Cost in Dallas-Fort Worth? "Local labor rates and home construction norms play a significant role in the final installation quote." A fair market price for ceiling fan installation in Dallas-Fort Worth—according to surveys and local company data—lands around $120–$200 for straightforward swap-outs. Expect that number to climb up to $550 for high ceilings, missing boxes, or jobs with lots of extra electrical work. Outside these ranges, be wary of quotes that seem too good to be true; they often skip quality checks or code compliance that lead to higher costs later on. Always get multiple estimates from well-reviewed, licensed electricians and clarify exactly what’s included. Labor rates should reflect not only the complexity of your install, but also the value of expert workmanship and safety. People Also Ask: Frequently Searched Ceiling Fan Installation Cost Questions How much do electricians usually charge to install a ceiling fan? Electricians typically charge $75–$125 per hour, with the total ceiling fan installation cost ranging from $120 for a simple swap up to $400+ for new wiring or high ceilings. How much does Home Depot charge to put up a ceiling fan? Home Depot’s installers typically offer a flat rate per fan, averaging $120–$270 depending on the complexity and location. How much does it cost to install a ceiling fan? Ceiling fan installation cost varies by region, task complexity, and ceiling height, but expect the range to be $120–$550 overall. How much does Lowes charge to install a ceiling fan? Lowes installation services usually quote $120–$350 for ceiling fan installation cost, depending on install type and region. FAQs About Ceiling Fan Installation Cost, Process, and Risks What's included in typical ceiling fan installation cost quotes? — Most quotes include labor, basic mounting brackets and hardware, testing, and cleanup, but not always new wiring, high ceiling surcharges, or disposal of old fans. Ask for an itemized list. How does ceiling height affect installation cost? — Higher ceilings require special ladders, longer setup times, and more manpower. This often adds $100–$250 to the bill. Should I upgrade the light fixture or add a wall sconce with my fan installation? — Combining upgrades saves on labor but adds material cost. Upgrading at install time is recommended for best results and code compliance. What are signs of poor-quality fan installation? — Wobbling blades, flickering lights, strange noises, or non-working remotes are red flags. Quality installs always balance blades, secure the box, and test every feature. Hire a professional electrician to correct issues if noticed. Key Takeaways: How to Get the Best Ceiling Fan Installation Cost Compare multiple professional electrician estimates Understand the impact of home wiring and ceiling height Factor in savings from getting it done right the first time Ask about code compliance and warranty Ready to Get a Ceiling Fan Professionally Installed? Get Quick, No-Obligation Quotes Now Finding the best deal on ceiling fan installation cost is all about planning ahead, understanding what drives the price, and always hiring a qualified professional. Start your search for licensed electricians in Dallas-Fort Worth today, compare detailed quotes, and enjoy peace of mind under your new fan.

02.08.2026

Are Air-Source Heat Pumps a Good Fit for the Northern Irish Climate?

Plumbrite 📍 Address: 63A Battlehill Rd, Portadown, Craigavon BT62 4ES, UK 📞 Phone: +44 7933 830316 🌐 Website: http://plumbrite.org.uk/ ★★★★★ Rating: 5.0 Understanding Energy Choices: Why Air-Source Heat Pumps Get Everyone Talking Look outside on a typical Northern Irish morning—crisp air, low clouds, and that famous, ever-present drizzle. For many families, this unpredictable weather raises a vital question: how can you keep your home warm and comfortable without spending a fortune? The past decade has seen a surge of interest in air-source heat pumps, promising cleaner air and lower bills. But with so many options and opinions, homeowners often wonder: are air-source heat pumps a practical choice for our unique, damp, and cool climate? Getting to grips with any new heating technology can be daunting. Energy costs are rising, environmental concerns are more urgent than ever, and the push to reduce carbon footprints sits at the heart of daily decisions. In this context, air-source heat pumps have become the talk of the town for people hoping to make their homes not only cosier but also kinder to the planet. But are these systems the smart upgrade everyone says they are, especially in a climate famous for its chilly winds and endless rain showers? By exploring performance, efficiency, and real-world experiences, this article demystifies what air-source heat pumps truly offer Northern Irish homes—setting you up with clear facts to make an informed, confident choice. What Are Air-Source Heat Pumps? A Simple Solution for Complex Climates An air-source heat pump is a clever device that gathers heat from the air outside—even on cold days—and pumps it into your home to keep it snug and warm. Unlike oil or gas boilers, which create heat by burning fuel, air-source heat pumps use electricity and natural processes to move warmth, making them far more energy-efficient. They don’t just save energy; they can lower both your bills and your environmental impact. The trick lies in their design: they harness natural temperature differences, meaning that on damp or chilly Northern Irish days, they can still provide reliable comfort indoors. Yet, many people wonder if these systems can handle the local climate, which is well known for its persistent rain, moderate cold, and a lack of truly freezing spells. Here’s the thing—all heating systems perform differently depending on where you live, how your home is built, and the kind of warmth you expect. Without a proper understanding of how air-source heat pumps work and how climate affects their efficiency, it’s easy to be left in the cold or pay for expensive changes that don’t pay off. Some people may even risk disappointment or higher-than-expected energy costs if they dive in without checking the fit for their home and lifestyle. That’s why knowing how air-source heat pumps behave in Northern Ireland’s climate is not just useful—it’s essential for anyone considering a more efficient future. How Air-Source Heat Pumps Match Northern Irish Weather Patterns Plumbrite stands out as an expert voice with over 30 years of practical experience in designing efficient heating systems for a range of local environments. Their approach focuses on tailoring systems to specific homes and user preferences, recognising that the Northern Irish climate poses both challenges and advantages for air-source heat pump performance. One of the main benefits is the mildness of winters in the region. While it often feels cold and damp, wintry temperatures rarely plunge far below freezing, which works in favour of air-source heat pumps because these devices are most effective in temperate, not extreme, cold. Homeowners benefit from this sweet spot. Air-source heat pumps can reliably extract warmth from the outdoor air—even in winter—delivering steady heat inside without the spikes in fuel consumption typical of older systems. The promise of lower energy bills is matched by a more stable, comfortable home environment, protected from the sudden chills that sometimes sweep through older, draughty buildings. From reducing monthly expenses to protecting against future energy price rises, heat pumps harness the provided local environment rather than fight against it—making them not only a viable, but a wise choice for Northern Ireland. Personalised Efficiency: Why Choosing the Right System Matters Another lesson learned by experts in heating system design is that no two homes are identical, and no single heating solution suits everyone. Plumbrite emphasises the importance of shaping the heating system—air-source heat pump included—to match both building characteristics and personal comfort preferences. Northern Irish weather demands year-round performance and reliability. When an air-source heat pump is correctly specified and installed, it works with the insulation and layout of your home rather than against it, capturing maximum efficiency and comfort. By avoiding one-size-fits-all solutions and relying on detailed assessments, homeowners get systems that respond to their needs, not just to outside temperatures. That’s what sets energy-smart installations apart from quick fixes; the result is a heating system that delivers constant, gentle warmth while curbing waste and making practical use of every penny spent on energy. The end result? Reduced carbon footprint, lower bills, and a more comfortable living space—regardless of how many rainy days the forecast predicts. From Fossil Fuels to Future-Proof: How Heat Pumps Support a Greener Northern Ireland Northern Ireland, like much of the world, faces increasing pressure to move away from traditional oil and gas heating, both for environmental and economic reasons. Air-source heat pumps are at the forefront of this transition, offering homeowners a practical way to slash their reliance on fossil fuels. Unlike boilers that need regular topping up or emit carbon dioxide, these systems use electricity and work cleanly in the background, quietly supporting wider climate goals. For many families, this greener approach also brings peace of mind—knowing your everyday comfort is contributing to a more sustainable community. Making the switch to air-source heat pumps is more than a technical upgrade; it’s a commitment to future generations, ensuring homes are part of the solution, not just the problem. Maximising Performance: Tips for Getting the Most from Your Air-Source Heat Pump While the technology behind air-source heat pumps is advanced, day-to-day operation is simple and user-friendly—especially when supported by experts who design and maintain systems for local conditions. The foundation for efficient operation begins with an initial assessment, making sure the chosen system suits both the building and the preferences of those living in it. Beyond installation, Plumbrite’s seasoned approach stresses the importance of regular servicing to keep everything running smoothly and safely, year after year. Practical actions—like checking insulation, using thermostats wisely, and arranging for timely maintenance—can ensure that every pound spent on heating goes further. In a place where comfort truly counts, the value of a smooth-running, energy-smart heating system cannot be overstated. Plumbrite’s Approach: Over 30 Years of Expertise in Smart Heating Solutions With decades of hands-on experience, Plumbrite has established itself not only as a trusted name in plumbing but as a reliable authority in modern, efficient heating design. Their philosophy centres on providing smart plumbing solutions tailored to the individual, treating every home or business as unique. This commitment to custom design ensures each installation—whether a new air-source heat pump or a full system overhaul—supports both comfort and energy savings for the long term. Underpinning their work is an attention to detail, highlighted in the way systems are evaluated, installed, and serviced. Plumbrite’s customer-focused outlook means every solution is future-proofed as much as possible, providing peace of mind in a rapidly changing energy landscape. Bringing over 30 years of expertise to every project, their dedication to reliable, efficient heating creates conditions where air-source heat pumps can truly thrive—even in the famously unpredictable Northern Irish climate. What Real People Say: Outstanding Service and Lasting Results Trust is often built through firsthand experience, and no recommendation speaks louder than the stories of real clients whose homes and comfort have been transformed by smart plumbing and efficient heating design. For families facing renovation headaches or stress, having a reliable expert on hand can truly make the difference between disappointment and genuine delight. If you want it done right, look no further. Faultless throughout with attention paid to every detail for a quality finish. We had a shower explode in the ensuite with a lot of damage, Brian and co were able to fully restore this room beyond expectations, aswell as resolving other ongoing plumbing issues whilst on site. Hearing this level of satisfaction affirms not only technical precision but also the lasting peace of mind that comes from jobs done well. For homeowners considering air-source heat pumps, this kind of expertise suggests that careful planning and thorough service lead to results that exceed expectations—making the choice to upgrade a rewarding and reliable investment. How Air-Source Heat Pumps Pave the Way for a Smarter Energy Future in Northern Ireland The drive for cleaner, more reliable heating isn’t just about saving money—it’s about choosing technology that fits the local climate and supports wider environmental goals. Air-source heat pumps, especially when supported by experts with deep knowledge of Northern Irish homes and weather, offer a real pathway towards a smarter, more sustainable way to keep warm. Plumbrite’s track record in efficient heating system design and installation brings authority and reassurance to families weighing their options. When strategically chosen and expertly maintained, air-source heat pumps can be an excellent fit for the Northern Irish climate—turning unpredictable weather into a reliable resource for comfort and savings. Contact the Experts at Plumbrite If you’d like to learn more about how air-source heat pumps could benefit your home and comfort in the Northern Irish climate, contact the team at Plumbrite. 📍 Address: 63A Battlehill Rd, Portadown, Craigavon BT62 4ES, UK 📞 Phone: +44 7933 830316 🌐 Website: http://plumbrite. org. uk/ Plumbrite Location and Hours 🕒 Hours of Operation:📅 Monday: 8:00 am – 5:00 pm📅 Tuesday: 8:00 am – 5:00 pm📅 Wednesday: 8:00 am – 5:00 pm📅 Thursday: 8:00 am – 5:00 pm📅 Friday: 8:00 am – 5:00 pm📅 Saturday: ❌ Closed📅 Sunday: ❌ Closed

Terms of Service

Privacy Policy

Core Modal Title

Sorry, no results found

You Might Find These Articles Interesting

T
Please Check Your Email
We Will Be Following Up Shortly
*
*
*